
Here you'll find steps on how to transfer domains across Google accounts without unlocks, EEPs, mandatory wait times, and more.
This process is streamlined since nearly everyone has a Google account. All in all, you're maybe looking at 6 minutes to do this assuming you have both accounts ready to roll.
If you don't have to transfer your domain from Google Domains and are just wondering how involved it is, no problem. It's easy to do.
The type of actions required isn't much different than a regular external transfer. Some of the terminologies are a bit different as well, such as authorization code versus EEP code, etc.
Here we go!
Table of Contents
Step by Step Instructions on How to Transfer a Google Domain to Another Google Account
1) Transfer In Page
After logging in, click the Transfer in link on the side menu on the Google Domains page.

2) Transfer Your Domain
In the Transfer your domain section in the middle of the page, type your domain in to the field, including the TLD and press Continue.

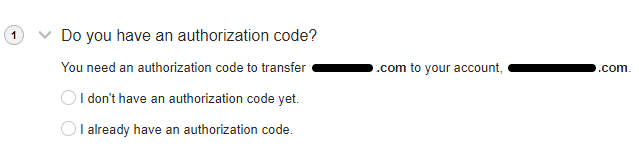
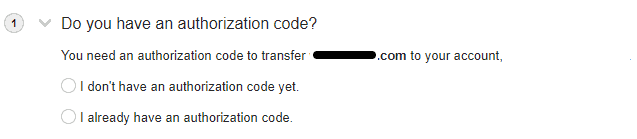
3) Authorization Code Check
So far so good. You'll see this authorization code question with 2 options.
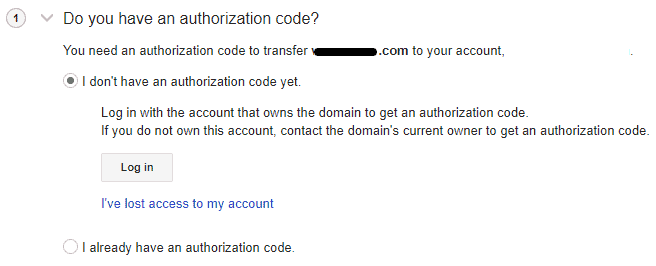
4) No Code, Log In
You don't have a code yet so select the I don't have an authorization code yet radio button. Then press the Log in button in the section that appears below your selection.
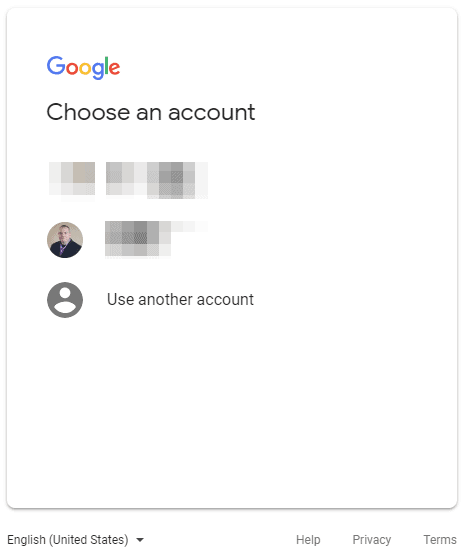
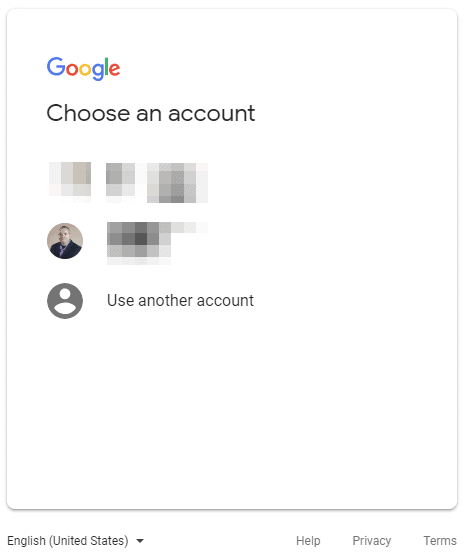
5) Choose First Account or Sign In
No surprises here. Log in or select the originating Google account (where the domain is coming from).
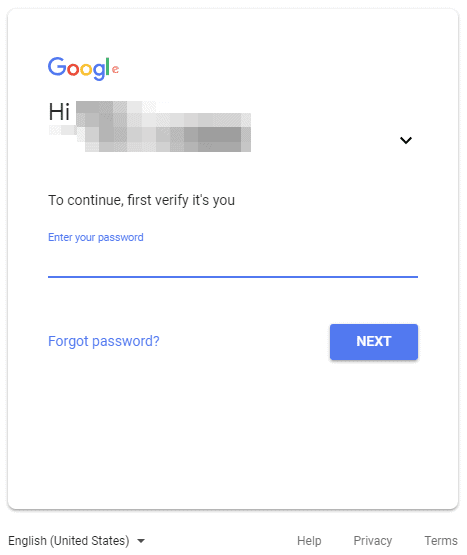
6) Enter First Account Password
Now, enter your password for the first (from) account.
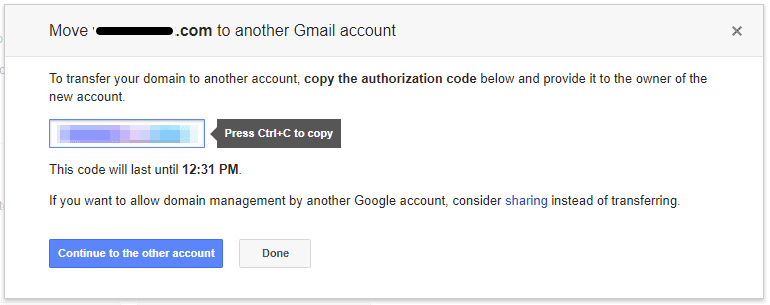
7) Copy Authorization Code
Once authenticated, you'll see this prompt to move your domain to another Google account. They call it a Gmail account here but it's the same thing. Place your cursor in the text box and press Ctrl+C to copy the code. The code will be valid for 2 hours but with something this important we wouldn't wait around on it.
When you've copied the code press the Continue to the other account button.
Side note: Google domains allow sharing for management as well. Pretty cool.
8) Choose Second Account or Sign In
Ah, a familiar screen. Now select the other destination account the domain will go to.
9) Back to Authorization Code Check
We've seen this question before but now you do have the authorization code.
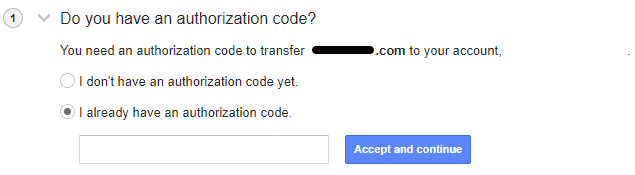
10) Have Code, Proceed
Go ahead and select the I already have an authorization code radio button. In the text field that appears, paste the authorization code you copied earlier and press the Accept and continue button.
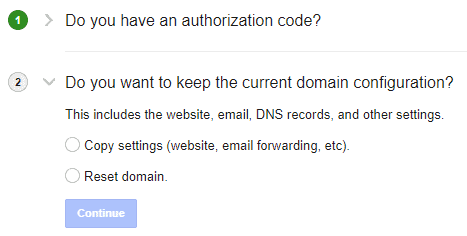
11) Current Domain Settings
A "second" step will now appear. Whether you want to copy your DNS records or start over again is up to you. We ended up selecting Reset domain on this particular domain since we were moving hosts as well and had new IPs and other settings to do. If you have the same host, email provider, or other DNS related settings, go ahead and select the Copy settings radio button.
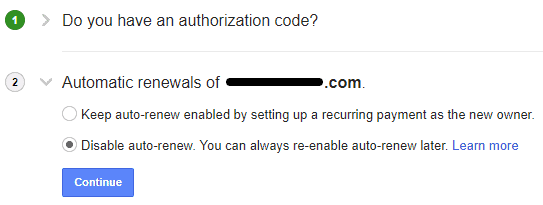
12) Automatic Renewal Setting
Now you can select whether you want to auto-renew this domain. We originally selected Disable auto-renew when we went through this but later turned it on. As a business owner or entrepreneur, we highly recommend you set this on Keep auto-renew to make sure you never have the risk of losing your sweet domain name.
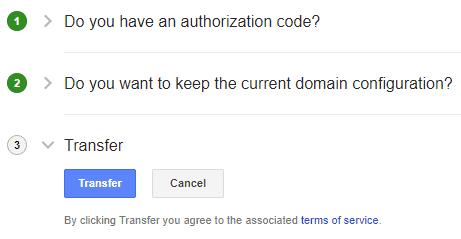
13) Initiate Transfer
We're about done with the tedium. Press the Transfer button to agree to the terms and kick this transfer off.
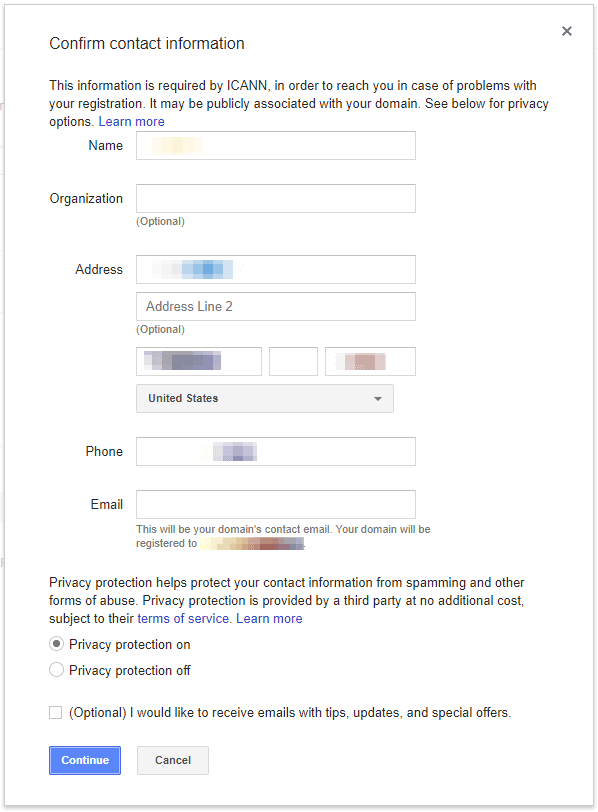
14) Update Contact Information
Now just confirm your contact information. This will automatically pull your saved info from your new account. If anything needs to be changed, go ahead and change it here. If you need to change your contact information in the future for this domain, don't worry, you're able to change it later.
15) Check Email for Confirmation
It's confirmation time. This may seem a bit excessive but you'll be happy this type of security exists. Look for your confirmation email in your old Google account. For one domain, we actually had it sent to our new Google account email as well. If this happens, just confirm on both old and new Google accounts. Either way, it should appear within seconds. Just keep an eye out.
Also, you have a week to finish the transfer. Just go ahead and do it now.

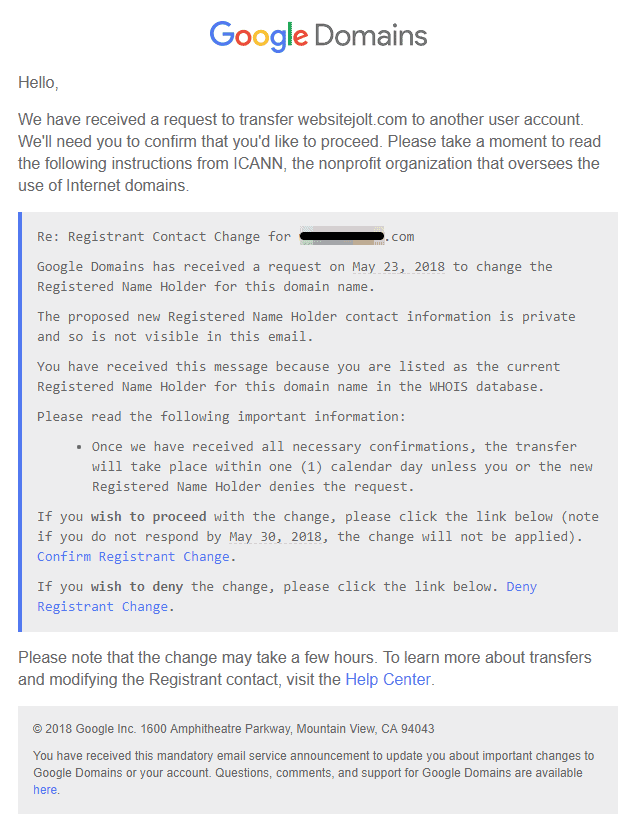
16) Confirm Transfer Request
Here's what your confirmation email will look like. If you are not the same person across 2 Google accounts, not to worry, your personal information won't commingle.
Click on the Confirm Registrant Change link towards the bottom of the email to proceed. The transfer will finalize in one day.
17) Transfer Change Complete
After clicking the link in the email you will receive confirmation that The change was completed! You may get a notice about a response being recorded instead of this banner notification. If you do, it's basically the same thing. The change may take a few hours but most of them happened instantly for me. We transferred around 20 domains.

18) Verify Transfer Change
Back on the Transfer in page from the beginning, you can see the completion status under the Incoming Transfers heading in the middle of the page.

That's it. Not too bad right?
The detailed steps kind of make this process look a lot longer than it actually is. Out of all the registrars we've transferred domains from, this one definitely ranks among the easiest to do.
We hope that helps. We'll catch you next time. What has been your experience transferring domains across Google accounts?
